In this instruction on how to create a superblock we use a simple setup of three blocks. They are linked together, without any signals between them, from left to right B0, B1 and B2. For simplicity this stretch is not connected to anything else. This is how it looks on the territory for which we have highlighted the middle block B1.
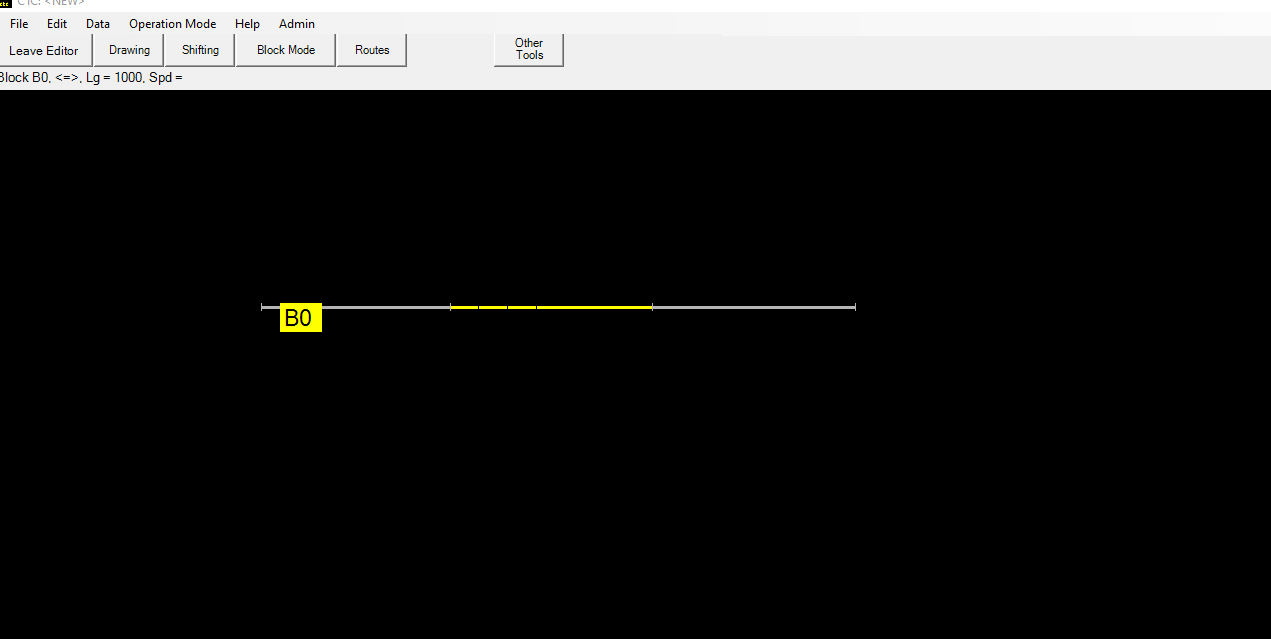
The three blocks on the layout, showing also the location of B0.
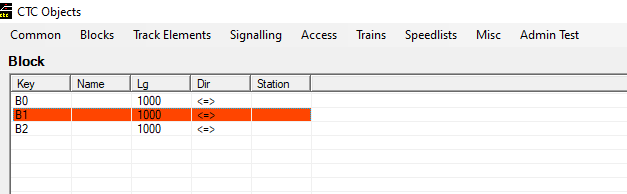
The same three blocks in the detailed list.
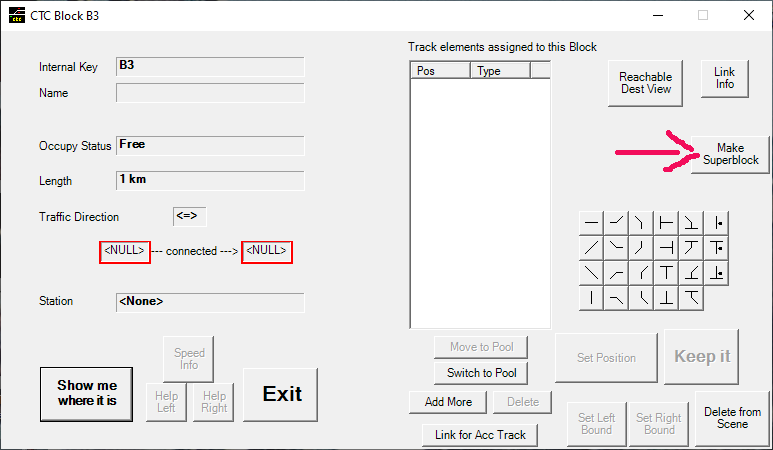
The first step is to create a new block. Just hit “Add More” on the detailed list to add a new block: “B3“ will be created, and the detailed info for B3 will be shown. Note the button “Make Superblock” – usually it is not visible, but this a brand-new block. Hit this button.
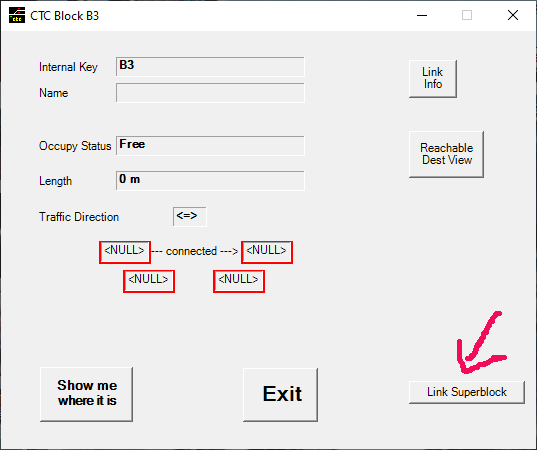
This will change the layout immediately to reflect the fact that “B3” is now dedicated as a superblock: Many fields have disappeared, and now you have connections to four other elements instead of the usual two. Hit the button labeled “Link Superblock”.
This will open a link maintenance window as shown here. See the block “B3” is now in the link list. Move this window aside, but don’t close it (otherwise you’ll have to repeat this and the following steps).

Now open the detailed window for block “B0”, the left most block of the stretch we want to handle.
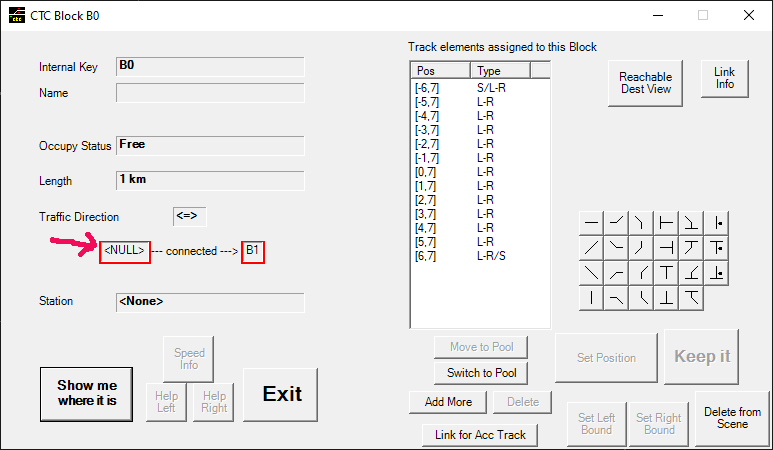
Note the left connection of “B0”. It says “<NULL>” , because we haven’t setup anything, but you could have for instance a link to a control block with signals. Right click on this field to add this link to the link maintenance tool.
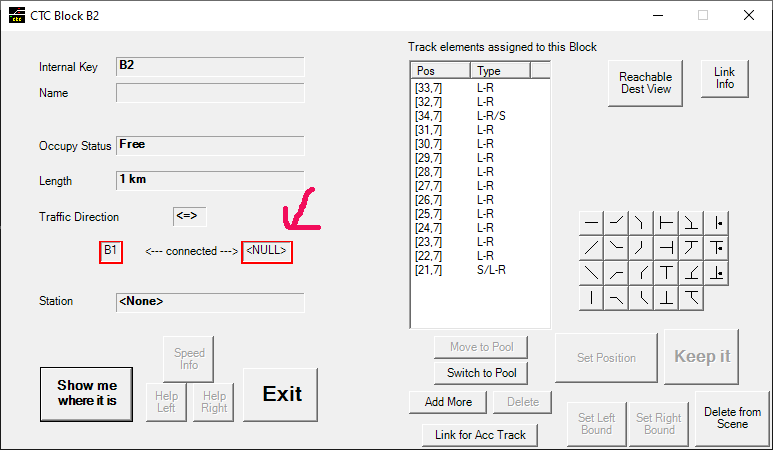
Do likewise with the block B2 on the right end of the stretch.
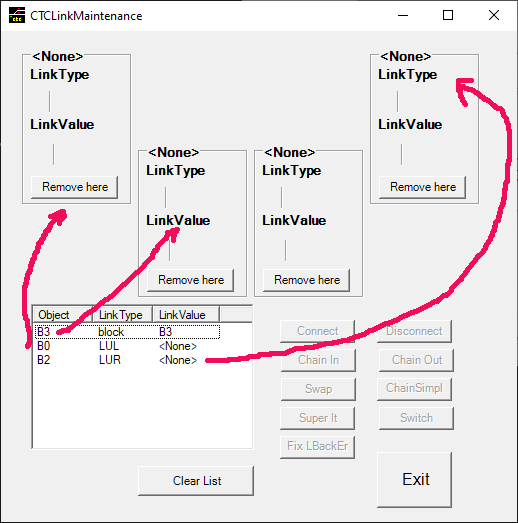
If you look now at the maintenance window, you’ll see something like this: Note the added entries for B0 and B2 – the connections of B0..B2 to the outside world (if you have any, the values would show up in the “Link Value” column here).
The link elements now need to be moved from the list to the fields in the upper half of this window as shown. The superblock linkage feature in the Link Maintenance Window requires the boundaries to be in the upper left and upper right field, so you need to click on the lines of objects B0 and B2, in that order, to fill these fields. The last one to be moved is the line of object B3 – it fills the third spot . The forth spot is not being used here.
If you have moved the elements correctly, the window should look like this. If you made a mistake you can move any elements back to the list (“Remove here”) and start over. Keep in mind that when moving up, the links will be filled using the next available free field – first the upper two, then the lower two, each from left to right. This is the same setup as shown in here.
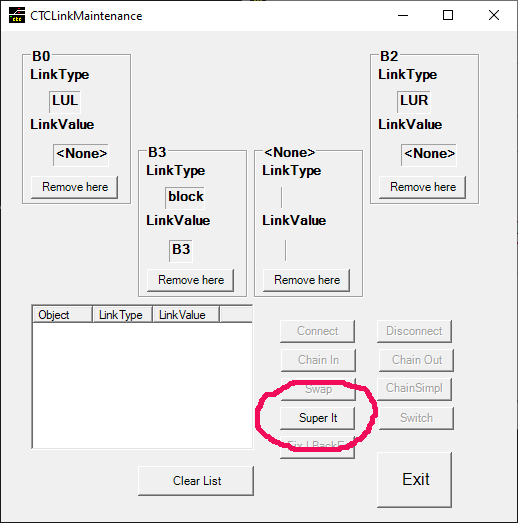
If everything is ok, the button “Super It” will be enabled. Click on it, and close this window. You’re done!
If you want to check the results, look at the detailed info for block B3, which will look something like this:

The fields labeled “<NULL>” represent now the connections of this block to the outside world, as it used to be from the original sequence B0…B2. Both ends of the stretch B0 to B2 are now hooked to our superblock. You can think of a train coming from the left into B3, crossing into B0, and after traveling the B0..B2 stretch appearing at spot B2 to cross B3 again and exit to the right. While a train is in the B0..B2 stretch, the block B3 will be marked as “occupied”
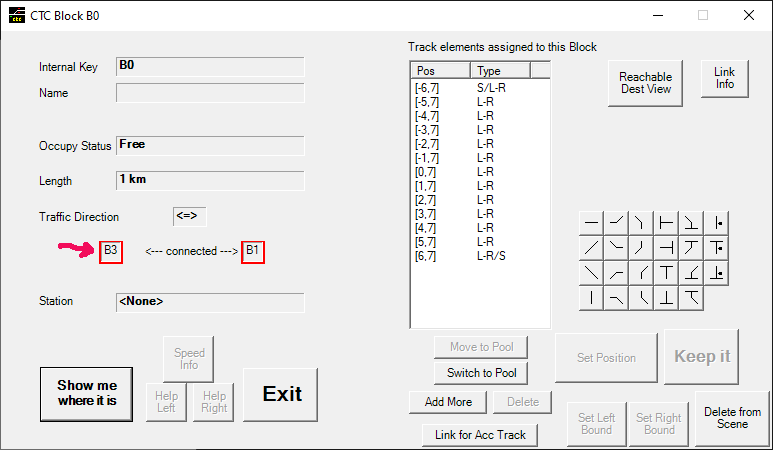
B0 on the other hand is now connected on the left to our superblock, as shown here.
In our example we had the left and right boundaries open (“NULL”). If you have some other elements connected here, the element on the left would have a linkage to B0 towards our stretch, and likewise on the right a linkage to B2. After making the stretch B0..B2 a superblock, both linkages will point to B3.