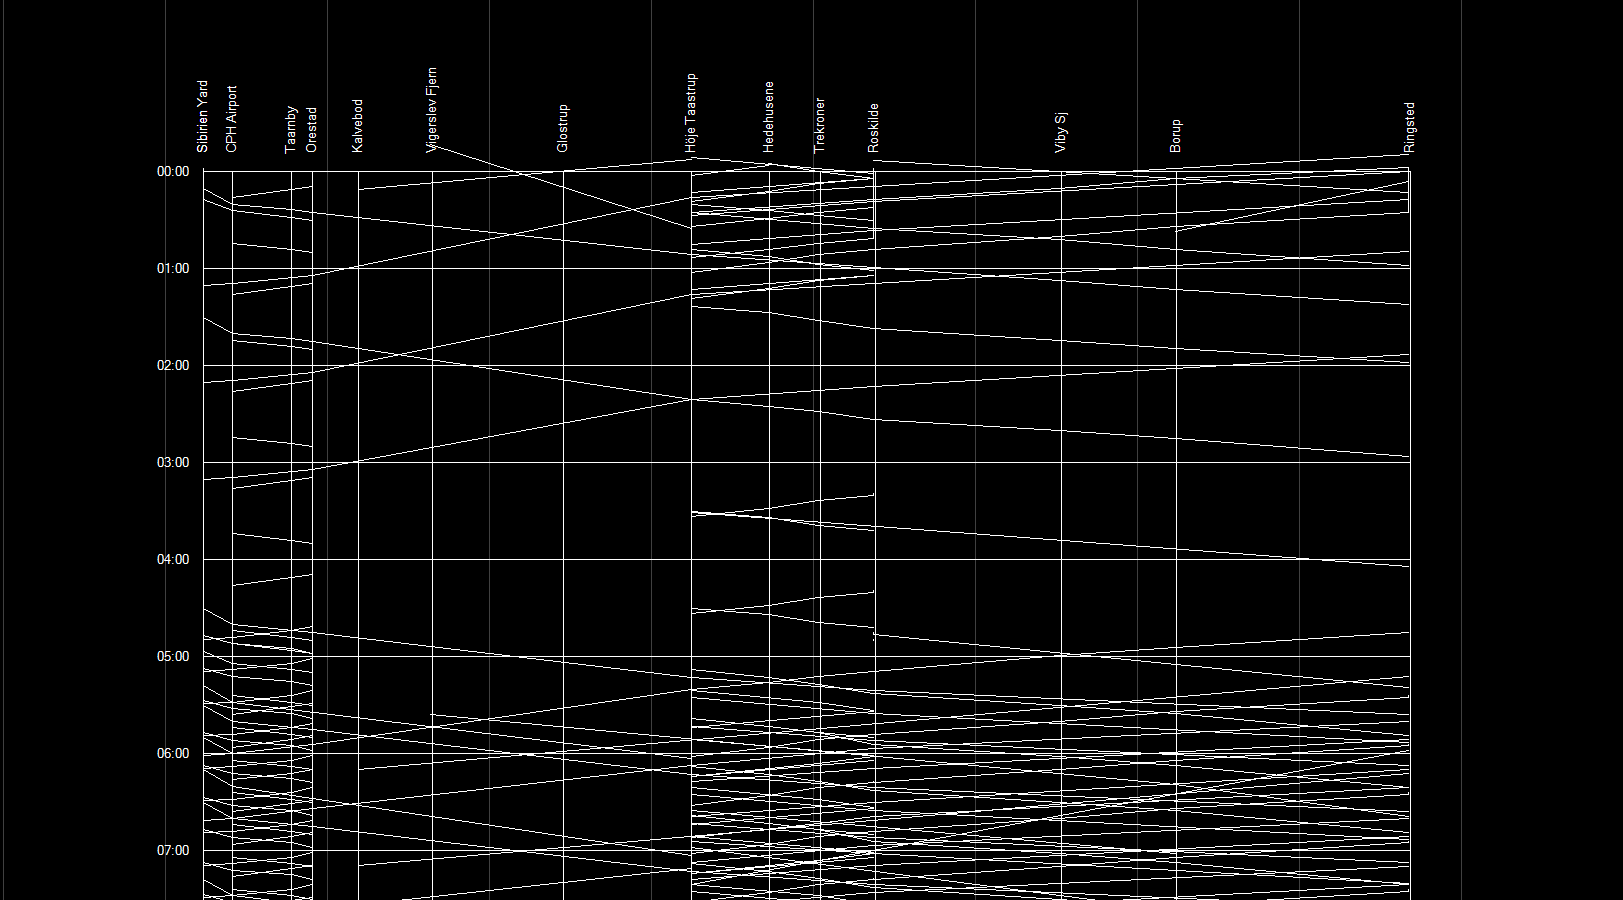
It is available under “Edit” → “Tools”, option “Routes”, mode “Route Type ANY” (1) and “Test Sched”. If you select a path by laying in a route, a graph will be produced showing all trains that are scheduled to have a stop on any station along the path and enter or exit near the block where the route starts or ends, including the starting block of the route. The station and extern names are indicated across the top, while the time is shown on the left. See this example from the “Copenhagen – Ringsted” territory with a route from the Sibirien Yard entry/exit to the Ringsted station.
If you have the “Detailed List” window active, and select the view “Trainsched” there, you can put particular schedules in the selected list there. The graphs of such selected schedules will be shown here in red.
Notes:
-
While you can also select “Route Type Trains” or “Route Type Switch”, the ability to select paths is restricted to what the route types permit.
-
Trains that could travel on the same path but don’t have anything to do with the stations or externs will not be displayed. The minimum for inclusion in this display is to have two points in their schedule.
-
If you have a choice, be sure to select a path that contains a particular station than a similar one without that station, since the latter one would omit station stops there even if the schedule has a stop at that station: the graph would show that the train passes through without stopping – there wouldn’t be even a vertical line showing the location of the station. Paths can be enforced by either concatenation of smaller routes or by user-locking switches.
-
If a schedule crosses midnight, a short segment may be displayed twice, one around the time 0:00, and the other around 24:00, with both extending beyond the boundary given by these time lines.
-
The exit point time is an estimate, since no explicit time is given.
-
You can select more than one route. If another route can be seen as a continuation of the previous route in the same direction, the whole graph will be extended to the right, otherwise the added graph will be shown a little bit to the right what is already shown.
-
The path of the routes need to be selected on the main screen. The “Routes” view of the “Detailed List” window will highlight active routes with a green background color. However, activation of routes there has no effect on this graphic display.
-
The graphs will remain on the screen as long as this window is not closed, even if you deactivate all active routes (“Reset Test” button on main screen or trying to activate a route in the “Detailed List” window).
-
You can navigate within the display with the mouse similar as you can on the main screen.